Tuesday, September 27, 2011

Now we have new address

Going forward all the new blog post will be only available on/at http://learnsoapui.wordpress.com/
This will be no longer active & i will not be able to reply to questions asked here.

So requesting all the blog followers & readers to subscribe the learnsoapui.wordpress blog feed.

Regards,
Pradeep Bishnoi

Friday, July 15, 2011

10 Groovy scripts on your finger tips - soapUI

In this series of Groovy blogs [numbered 10], i will be sharing very frequently  used "10 groovy scripts" which should be on your finger tips. These would come handy in order to perform any Automation using the Groovy in soapUI.

/* 
@Author : Pradeep Bishnoi
@Description : Collection of groovy script snippets required to achieve automation in soapUI
*/

1. Using Log variable
    log.info("Any Text message " + anyVariable)

2. Using Context variable
    def myVar = context.expand( '${#TestCase#SourceTestStep}') //will expand TestCase property value into the new variable
    context.testCase  // returns the current testCase handle

3. Using TestRunner variable
    testRunner.testCase.getTestStepByName("TestStepName")
    testRunner.testCase // return the handle to current testCase
    testRunner.testCase.testSuite.project.testSuites["My_TestSuite"]

4. Using MessageExchange variable
    messageExchange.getEndpoint() //endpoint to the selected teststep
    messageExchange.getTimestamp()    //timestamp
    messageExchange.getTimeTaken()    //time taken to process the request/response

5. Using Project, TestSuite, TestCase, TestStep methods
    def project = testRunner.testCase.testSuite.project
    def project = context.testCase.testSuite.project

    def myTestSuite = project.getTestSuiteAt(IndexNumber)
    def myTestSuite = project.getTestSuiteByName("Name of the TestSuite")

    def myTestCase = myTestSuite.getTestCaseAt(IndexNumber)
    def myTestCase = myTestSuite.getTestCaseByName("Name of the TestCase")

    def myTestStep = myTestCase.getTestStepAt(IndexNumber)
    def myTestStep = myTestCase.getTestStepByName("Name of the TestStep")

6. RawRequest & RawResponse
    messageExchange.getRequestContentAsXml.toString()
    messageExchange.getResponseContentAsXml.toString()

7. groovyUtils & XmlHolder
    def groovyUtils = new com.eviware.soapui.support.GroovyUtils( context )
    def holder = groovyUtils.getXmlHolder ("Assert_Script#Response")

8. Converting String into Integer & Integer into String using groovy
    anyStringVar = anyIntegerVar.toString()
    anyIntegerVar = anyStringVar.toInteger()

9. Reading & Writing user-defined property with Groovy
    def userIdInStep = testRunner.testCase.getTestStepByName( "UserDefinedProperty" )
    def userIdStr = userIdInStep.getPropertyValue( "myPropertyName" );
    userIdInStep.setPropertyValue("myPropertyName", "StringValueAsInput")

10. Refer soapUI API docs & go soapUI Pro inorder to get Advanced functionality without writing code ;-)

Happy Scripting!! Do share this blog post with others and also share any useful scripts/ideas if you have.

Groovy 9 - capturing RawRequest & Response

Few months back i was struggling to capture the Raw Request data from the test step and to store it (together with response) into a file. Now you might be wondering why to struggle so much if the test step request data can be simply accessed using :
testCase.getTestStepByName("myTestStep").getProperty("Request").getValue()
or 
context.testCase.getTestStepAt(0).getProperty("Request").getValue() 
or
testRunner.testCase.getTestStepAt(0).getProperty("Request").getValue()

Well above script snippets will fetch the request data from the mentioned/selected test step. However, if your test is parametrized then this (request data) will also appear as in same way as it appears in request window [i.e., not with actual parameter values].
Since, it is a parametrized request the original values of parameters can be found in the Raw tab of the teststep request window. This concept can be compared to "PreProcessors in C" or "Inline function of C++" where the actual values of parameter will be replaced before compiling the program. Here also, before sending out the request data (or say encapsulating it in SOAP envelope) to the server the parameter values will be replaced with each parameter calls in the test request.


If raw request data not used, then while performing the comparison of the different request & response data after final run, it would be difficult for us to trace what parameter value was passed during teststep run.
To overcome such issues, soapUI team also exposed couple of methods which can be used to extract the RawRequest / RawResponse data and so on. Shared below is one of the ways to get the raw request data :

messageExchange.getRequestContent().toString()


Monday, July 04, 2011

Groovy 8 – creating and manipulating Excel file using Groovy script in soapUI

Many of soapUI users wonder, if they can create and manipulate the data inside an Excel file using the soapUI's groovy scripting. Well answer is YES and through this blog i am putting an end to their concerns / questions.

As i might have mentioned in my previous blogs that Groovy Script together with soapUI provides utilitarian, seamless & efficient functionalities with infinite possibilities. So, i would say "your thinking is the limit, rest almost everything can be achieved using Groovy in soapUI".

From eviware forum, i found that soapUI is using the free Java Excel API to communicate or manipulate data in the Excel files. So, all this can be achieved using the JXL.jar file. All you need do is place the JXL api file in the “lib” folder of %SOAPUI_INSTALL_DIR%. This file can be downloaded @ http://sourceforge.net/projects/jexcelapi/files/jexcelapi/2.6.12/jexcelapi_2_6_12.zip/download

/*
@Author : Pradeep Bishnoi
@Description : Manipulate the data inside an Excel file using jxl api in groovy
@Ref : Thanks to Andy Khan for sharing the reference documents about JXL API.
*/

import jxl.*
import jxl.write.*
Workbook workbook = Workbook.getWorkbook(new File("c:\\myfile.xls"))
Sheet sheet = workbook.getSheet(0)
Cell a1 = sheet.getCell(0,0) // getCell(row,column) -- place some values in myfile.xls
Cell b2 = sheet.getCell(1,1)  // then those values will be acessed using a1, b2 & c3 Cell.
Cell c2 = sheet.getCell(2,1)
workbook.write()
workbook.close()

WritableWorkbook workbook1 = Workbook.createWorkbook(new File("d:\\output.xls"))
WritableSheet sheet1 = workbook1.createSheet("Worksheet Number 1", 0)
log.info(sheet1.isHidden())
Label label = new Label(0, 2, "Text input in Excel");
sheet1.addCell(label);
workbook1.write()
workbook1.close()

Keep watching this space... soon i will be posting about "how to export the test result & certain other things using the Groovy into the Excel file".

Wednesday, June 15, 2011

Groovy 7 - getStatus & getError message of each assertion in a teststep

In one of the blog post, somebody asked me how they can get the status of each individual assertion of a test step. So on my way to office, i managed to comeup with below is the script which will extend (rather append) the existing code written in blog post - "Groovy 6 - clone test step assertion using Groovy script in soapUI".

Please note, that the below provided script can be extended/merged with other script shared. For instance, you can place few code lines from the script and iterate through all the teststep inside a testcase.

Keeping watching/reading this space, soon i will be sharing the blogs on - communicating with JXL API (free Excel API) & interaction with database using the Groovy.

/*
@Title : Gr-ooooooo-vy VII
@Author : Pradeep Bishnoi
@Description : Get the status of each assertion inside a specific test step.
*/

import com.eviware.soapui.model.testsuite.Assertable
def project = context.testCase.testSuite.project
def testSuite = project.getTestSuiteAt(1)
def testCase = testSuite.getTestCaseAt(0)
def testStepSrc = testCase.getTestStepByName("myTestStepName")
def counter = testStepSrc.getAssertionList().size()

for (count in 0..<counter)
{

log.info("Assertion :" + testStepSrc.getAssertionAt(count).getName() + " :: " + testStepSrc.getAssertionAt(count).getStatus())
error = testStepSrc.getAssertionAt(count).getErrors()
if (error != null)
{
log.info(error[0].getMessage())
}
log.info("---------------------------- Line to seperate each assertion status in logs -----------------")
}

I would appreciate your valuable comments and other relevant inputs.  Keep sharing & be happy :-)

Thursday, June 02, 2011

Groovy 6 - clone test step assertion using Groovy script in soapUI

Yesterday, I found one interesting question in eviware forum [thread] : seeking the information about replicating the "Clone Assertion" feature from soapUI Pro into the soapUI open source using the groovy. So i thought of trying my hand on the same and shared below is the working piece of code to achieve the same.

P.S. : I have also updated the eviware forum thread and people who 'hates' blog can read the solution in the thread. And thanks to the user for raising this question in forum :-)

Initialize:
# Create 2 property at testcase level named "sourceTestStep" & "targetTestStep" respectively.
# Always copy and paste the name of teststep when update the value of newly defined property, so as to reduce the possibility of TYPO error.
# Create a groovy test step then paste the below code and run the test step. Done!

/*  
@Title : Gr-oooooo-vy 6
@Author : Pradeep Bishnoi
@Description : Clone all the assertion from TestStep [SourceTestStep proptery] into the target TestSTep [TargetTestStep property] by executing a groovy test step.
*/

import com.eviware.soapui.model.testsuite.Assertable
def project = context.testCase.testSuite.project
def testSuite = project.getTestSuiteAt(1)
def testCase = testSuite.getTestCaseAt(0)
def sourceTestStep = context.expand( '${#TestCase#SourceTestStep}' )
def targetTestStep = context.expand( '${#TestCase#TargetTestStep}' )

def testStepSrc = testCase.getTestStepByName(sourceTestStep)
def testStepTrgt = testCase.getTestStepByName(targetTestStep)
def counter = testStepSrc.getAssertionList().size()
for (count in 0..<counter)
{
    testStepTrgt.cloneAssertion(testStepSrc.getAssertionAt(count), testStepSrc.getAssertionAt(count).getName())
}

Groovy 5 - adding basic assertion using Groovy in soapUI

From the time i started using soapUI(both open source & Pro), I was struggling with one very simple though a painful issue. Adding basic assertion (like SOAP response, Not SOAP Fault) in each and every test step (where number of teststep is around 10+) of your TestCase/TestSuite. There may/are few alternatives available which can be used to acheive this, like create few basic assertion in one teststep and then clonse these assertion into other teststeps.

The above mentioned apporach can be used however that also require many click here and there. So i have written few lines of code to automate that part & these code lines can be customized and extended as per your testing needs.

To proceed with just create a new Groovy Test Step and execute that test step once. Please note: i am assuming you already have all the teststep created under a testcase.

/*   
@Title : Gr-ooooo-vy 5
@Author : Pradeep Bishnoi
@Description : Add 2 basic assertion (soap & not soap fault) in all teststeps using the Groovy script
*/

import com.eviware.soapui.model.testsuite.Assertable
def project = context.testCase.testSuite.project
def testSuite = project.getTestSuiteAt(1)
def testCase = testSuite.getTestCaseAt(0)

wsdlTestSteps = testCase.getTestStepsOfType( com.eviware.soapui.impl.wsdl.teststeps.WsdlTestRequestStep.class ) //test step

def testStepCount = wsdlTestSteps.size()
( 0..< testStepCount).each
{
        // SOAP Response      Not SOAP Fault
        if (!(wsdlTestSteps[it].getAssertionByName("Not SOAP Fault")))
        {
            wsdlTestSteps[it].addAssertion("Not SOAP Fault")
        }
        if (!(wsdlTestSteps[it].getAssertionByName("SOAP Response")))
        {
            wsdlTestSteps[it].addAssertion("SOAP Response")
        }
       
 log.info("Assertion created into Teststep :: " + testCase.getTestStepByName(wsdlTestSteps[it].getName()).getName().toString())
}

Do share the same with others & provide your comments on the same, anything.
// Slight formatting/editing may be required in the code lines when pasting it into soapUI script editor.

Tuesday, May 24, 2011

Groovy IV - how to log response size, request size, time taken


/*
@Title : Gr-oooo-vy Code IV
@Description : to log the response size, request size and time taken to get the response data.
@Author : Pradeep Bishnoi
*/

Last few blogs were related to Groovy script, however i didn't mentioned about one of most useful groovy code lines which can be very handy when you want to verify the certain things without actually looking into the response data.

The cases where you want to time taken by server to provide the response, or the validating the response data by verifying/comparing  the size of response data or request data. I personally use these script lines to frequently see all the logged data when executing the testcases/testsuite for validating the correctness of my data. For instance, if you recv a valid response for a request size would be xx Bytes and whenever there is any error it would be yy Bytes. Similarly, if the timetaken by response is exceeding your assigned/recommended values, you can use this to verify (note: you can also use 'assert' keyword to use any specific value as the assertion).

Use the below provided code lines in the groovy script assertion of each test step in a testcase.

log.info("~~~~~~~~~~~~~~~~~~~~~~~~~~~~~~~~~~~~~~~~~~~~~~~~~~~~~")
log.info("Request size :" + messageExchange.requestContent.size())
log.info("Response size :" + messageExchange.responseContent.size())
log.info("Time :" + messageExchange.getTimeTaken())

With every run of the teststep, script log section/tab will update the display with the size of request, response & timetaken to provide the response.

Monday, May 23, 2011

Groovy III - text file as Data Source for input

/*
@Title : Gr-ooo-vy Code III
@Description : using text file as Data Source using Groovy code lines
@Author : Pradeep Bishnoi
*/

This is another blog post unleashing the power of Groovy script to perform certain set of task. SoapUI users, who have used the 15 days trail license of SoapUI Pro version, must be missing various important features, after license expiration. Well, in this blog i will try to replicate one of the important feature of Data Source [provided by Pro version] using the Groovy. A lot can be achieved using the Groovy...

Recommendation : I would encourage users to go for soapUI Pro license to avail many more useful features + the support from soapUI support team. Go soapUI Pro!!

Copy and paste the below provided code lines in the TearDown script for the selected TestCase.


import com.eviware.soapui.support.XmlHolder

def groovyUtils = new com.eviware.soapui.support.GroovyUtils( context )

def folderName = "D:/Automate/response"  //to store the resonse
def createFolder = new File(folderName)
createFolder.mkdir()

def testSuite = testRunner.testCase.testSuite.project.testSuites["My_TestSuite"]
def testCase = testSuite.getTestCaseAt(0)
def testStep1 = testCase.getTestStepCount()

def xHolder = new XmlHolder(testCase.getTestStepAt(0).getProperty("Response").getValue())

File tempFile = new File("D:/data_source_file.txt")
List lines = tempFile.readLines()
def i=0
def temp1 = 0
def inputValue

def myTestStep
def myTestRunner
def myTestStepContext
//Loop through all the names of the test steps.
( 0..<testStep1 ).each
{
    i=0

   tempFile.eachLine
    {
        testCase.setPropertyValue("inputValue", lines[i++])
        inputValue = context.expand( '${#TestCase#inputValue}' )
        myTestStep = testCase.getTestStepAt(temp1)
        myTestRunner = new com.eviware.soapui.impl.wsdl.testcase.WsdlTestCaseRunner(myTestCase, null)
        myTestStepContext = new com.eviware.soapui.impl.wsdl.testcase.WsdlTestRunContext( myTestStep )
        myTestStep.run( myTestRunner, myTestStepContext )
       

xHolder = new XmlHolder(testCase.getTestStepAt(temp1).getProperty("Response").getValue())
        f = new File( folderName + '/' + inputValue + '_' +  testCase.getTestStepAt(temp1).getName().toString() + '.txt')
        f.append("\r\n\r\n\r\n\r\n\r\n")
        f.append("#################################################\r\n")
        f.append("\t\t\t Response \r\n")
        f.append("#################################################\r\n\r\n\r\n\r\n\r\n")
        f.write(xHolder.prettyXml)
        xHolder.clear()
   
    }
    temp1++
}


Now all the response will be stored in the filename with specific name [inputvalue_teststepname.txt] in the folder name defined in the above part of the code.Also, you have to create a user defined property under the TestCase (test properties) and name it as "inputValue" [Case Sensitive]. And use this user defined property in all the teststep as the parameterized input. 
Updated : Code lines mentioned above are updated after recieving the feedback from the users. There was some problem with HTML tags, so the actual code was not visible. Now it should work.

Thursday, May 19, 2011

Gr-oo-vy II – testrunner/context variable

Use of the testrunner variable to get the response data of any specific teststep.
def request = testRunner.testCase.getTestStepByName( “myTestStepName” );
def responseData = request.getProperty( “Response” );
log.info(responseData.value)
To display the name of project, testsuite, testcase & teststep:
def project = context.testCase.testSuite.project
log.info(project.name + “   ” + project)
def testSuite = project.getTestSuiteAt(1)  // 1 is the index number of testsuite
log.info(testSuite.name + “   ” + testSuite)
def testCase = testSuite.getTestCaseAt(0)  // 0 is the index number of testcase
log.info(testCase.name + “      ” + testCase)
def testStep = testCase.getTestStepAt(7) // 7 is the index number of teststep
log.info(testStep.name + “    ” + testStep)
To count the number of testsuites, testcases, teststeps use the below code :
def project = context.testCase.testSuite.project
log.info(project.name + “   ” + project.testSuiteCount)
def testSuite = project.getTestSuiteAt(1)
log.info(testSuite.name + “   ” + testSuite.testCaseCount)
def testCase = testSuite.getTestCaseAt(0)
log.info(testCase.name + “      ” + testCase.testStepCount)
def testStep = testCase.getTestStepAt(7)
log.info(testStep.name + “    ” + testStep)
We can use the above code and put them into a loop (for/each) to iterate through all the elements. In below example, we iterate through all the test steps under a testcase :
for (int count in 0..<testcase.teststepcount)
{
log.info(testCase.getTestStepAt(count).getName() + “  is our testStep number ” + count)
log.info(“Is this test step disabled? : ” + testCase.getTestStepAt(count).isDisabled())
}
OR

( 0..<teststep1 ).each{
    log.info(testCase.getTestStepAt(it).getName())
    }

Go Groovy with soapUI - nifty tool for Webservice testing!

Here i go with first groovy post about using Groovy script in soapUI. groovy comes very handy when you want to put some script assertion or performing certain task before/after each teststep execution etc.

First couple of things to remember before we proceed with actual code lines.

# Groovy script can be written in Assertaion, Test Step, TestCase/TestSuite level as TearDown/Setup script.
# To invoke the groovy script at each different level, script editor provides us with the list of variables on top right corner of script editor. So it is possible that the code you have written in groovy test step or as teardown script would not work properly for teststep script assertion.


In most of the cases we use either "context" or "testrunner" variable to invoke or create a new object of any class or to call required method.

I frequently use these 2 standard lines of groovy code, to acheive the required script objective, are :

def groovyUtils = new com.eviware.soapui.support.GroovyUtils( context )

def holder = groovyUtils.getXmlHolder (java.lang.String xmlPropertyOrString) // where this xmlProperty can have either 'teststepname#response' 'teststepname#request' or any string value.


After having the object created refer the groovyUtils APIDocs (http://www.soapui.org/apidocs/com/eviware/soapui/support/GroovyUtils.html) to find out all the relevant methods which can be called with particular input parameter.

Now below are few code lines for quickly performing certain task :


/* 
@Author : Pradeep Bishnoi
@Description : To count the number of nodes under any node in response using xPath & groovy script.
*/
def groovyUtils = new com.eviware.soapui.support.GroovyUtils( context )
def holder = groovyUtils.getXmlHolder ("myTestStepName#Response")
holder.namespaces["namespacename1"] = "http://mywebservice.com/soapui/testing"
log.info("Number of nodes :" + holder.getNodeValue("count(//namespacename1:GetSampleMethodResponse/namespacename1:StudentDetails/namespacename1:Address)"))

// Address is comprised of house number, street name, city, country - so result = 4

/*
@Description : To store the response into a simple text file, append this code to the above.
*/

new File('D:/response_myTestStepName.txt').write(holder.prettyXml)

Do provide your inputs/comments/question on the same blog and share if you have something interesting. Thanks!

Tuesday, May 17, 2011

TestRunner - soapUI project execution from command line

Folks, in this post i will be covering the use of test runner - by which you can execute your soapUI projects (from command line) without opening soapUI application.

This feature will by very useful when you want to perform the regression test on the newly deployed code & to store the response data in some files. And execution can be done by anyone (including people who don't know "how to use soapUI").

testrunner.bat (soapui_install_dir/bin folder) is a command line utility which is getting called whenever we execute our testcases with some predefined (or userdefined) conditions. In soapUI application, right click on any selected testcase/test suite and then select "launch test runner" from the context menu to call the test runner.bat file. This will open a new window wherein you can provide the required configuration data like, testcase/testsuite to be executed, endpoint url, folder to store the response, ignore the error results and so on.
 After providing all the details, start the testrunner.bat by clicking launch button. In the window it will display the command line arguments being passed for the selected combination of input data.

Similarly, you can directly call the testrunner.bat from the command line utitlity and provide those parameters to perform the test execution. This will save lot of time to perform the test execution and also it can be executed by anyone (in your absence).
I have created a simple batch file (my_soapUI.bat) to perform this set of activity. So to perform the regression test, i need to just execute the "my_soapUI.bat" file from the command line and rest would be taken care.

cd C:\Program Files\eviware\soapUI-Pro-3.6\bin
testrunner.bat -ehttp://127.0.0.1/soapUI/Service.svc -sLoad_Test_Apr2011_TestSuite -r -a -fD:\Automate\store_response -I "C:\Documents and Settings\pradeep.bishnoi\My Documents\my_soapui-project.xml"

:: To override the endpoint for the teststeps use
:: -e(Endpoint URL)                
:: -ehttp://x.x.x.x/WebService.svc


:: TestSuite to run, used to narrow down the tests to run
:: -s(TestSuite Name under the project)                
:: -sTestSuiteSoapUI

:: TestCase to run, used to narrow down the tests to run
:: -c(TestCase Name under the project/testSuite)                
:: -cTestCaseSoapUI

:: r : Turns on printing of a small summary report. To be used when you want to save generated reports
:: -r                

:: f : Specifies the root folder to which test results should be exported
:: -f(Complete path of the folder where to save the response)
:: -fD:\soapUI\responseReport

:: a : Turns on exporting of all test results, not only errors. To be used when you want to export both passed and failed test step reports
:: -a                

:: I : Do not stop if error occurs, ignore them. Execution will continue even when any test step fails/error comes.
:: -I                

:: After providing all the parameters, pass the complete soapUI project file location in double quotes "" which contains the above mentioned testSuite & testCases for execution.
:: example      "C:\soapui-project.xml"
To use the same, just copy the code lines (in yellow colored font) and save them into a "my_soapUI.bat" file and edit the required parameters like endpoint, project file name, and folder to store the response etc.

EndNote : Biggest advantage of using the command line approach is #Faster execution since we are directly executing the project without opening the soapUI.

Wednesday, February 23, 2011

"Default" & "Custom" Properties - soapUI

In soapUI, we have different levels at which we can define or find the properties. User defined properties can be used to make the testing simpler and less time consuming by directly updating the property values without (resulting in changed request) updating each individual request. We can broadly categorize properties as # "Default" and "User-Defined" properties. Now when these properties are associated in soapUI at different level they provide different details.

Default properties : These are the set of properties which comes by default with every soapUI installation. We can change the values of these properties (not in every case) & consume as when needed.

User-Defined properties : These are the set of properties which the end user defines as per his requirement. It can be used a temporary storage for validating the end result of any test (like in assertion).  


Below is the list of different level of properties :

# Global Properties : specify/define the properties associated with installed version of soapUI. These properties can be access across the project/test suites/ test cases and so on.

# Project Properties : specify the properties associated with the current project. This property can be used by all the subset (test suite, test case, test step, script) of the project.

# Test Suite Properties : specify the properties associated with the current test suite. This property can be used by all the subset (test case, test step, script) of the test suite.

# Test Cases properties : specify the properties associated with the current test case. This property can be used by all the subset (test step, script) of the test cases.

# Test Step properties : specify the properties associated with the current test step. This property can be used by all the subset (test step, property transfer, script) of the test steps.


The expression to be used in the web service request (xml view) for the consuming any properties are :


OR just open the web service request where you want to call the available property & right click on the screen. Then navigate to Get Data... item in context menu and select the required property. Attached is image:


 Will cover some real time examples in the upcoming videos only for user-defined properties.

WebServices : REST vs SOAP

WebServices can be broadly classified into 2 types : REST based & SOAP based.

REST is an architectural style for building client-server applications.
SOAP is a protocol specification for exchanging data between two endpoints.


WS-* : Addressing, Security, Interoperability, Reliability etc

NOTE : Both the REST & SOAP have some pros & cons associated with them. So before prioritizing one over other do consider the suitability of the opted one in terms of speed, complexity & security.

My views : SOAP is highly secured and Security comes with price of slow speed (comparatively) & complexity.

Tuesday, February 22, 2011

Video : soapUI - Basics


Here is another video covering few very basic features which soapUI provides. Keep tracking this blog space for another video tutorial.

Monday, January 31, 2011

Video : how to use xPath match expression

Watch this video in full screen mode!
Please note, this shared video is available without any audio. I will try [no assurance ;) ] to provide the audio in the upcoming learning videos! And do share your feedback on the same. Thanks!


Assertions in soapUI - Why? How?

Before diving deep into the soapUI Assertions topic, let me throw some light on the word “Assertion” itself. This word may not be known to many of entry level testers. So we will go with the dictionary definition of the verb “Assert” which then forms the noun “Assertion”.
Assert: To declare or affirm solemnly and formally as true

Assertion: The act of affirming, asserting or stating something

From the above provided definition, we can conclude that Assertion in soapUI would help testers to affirm/confirm the correctness of test results/response. I assume that this answers the first part of the question “Assertion in soapUI – Why”.

Now moving to the second part of question “Assertion in soapUI – How”, which would require a detailed explanation. soapUI 3.6 supports around 14 different types of assertions, however in this blog we will cover the very basic & frequently used Assertion types. Below I have provided some assertions types and the detailed information about them.
  Type   Details
 Schema   Compliance  validates the response message against the   definition in the WSDL and  contained XML Schema
 SOAP Response  checks that the response is a valid SOAP   message, always use this to make sure you are actually getting a response (if   no assertions are added a connection error will not cause a failure).
 SOAP Fault  checks   that the response is a SOAP Fault (for negative testing)
 Not SOAP Fault  checks that the response is not a SOAP Fault. Never use this assertion type together with SOAP Fault, since they will have opposite results always [i.e., compliment of each other]
 xPath Match  validates   the response message against the data returned by xPath expression & any   tag in response.
 xQuery Match  validates   the response message against the data returned by xQuery expression & any   tag in response.
 Contains  validates   the response message contains a particular string or regular expression   provided in 'Contains' assert condition.
 Script   Assertion  validates   the response message against data returned by the code of lines written in   Groovy script. Useful to verify the response data against the Database which   can fetched using Groovy script

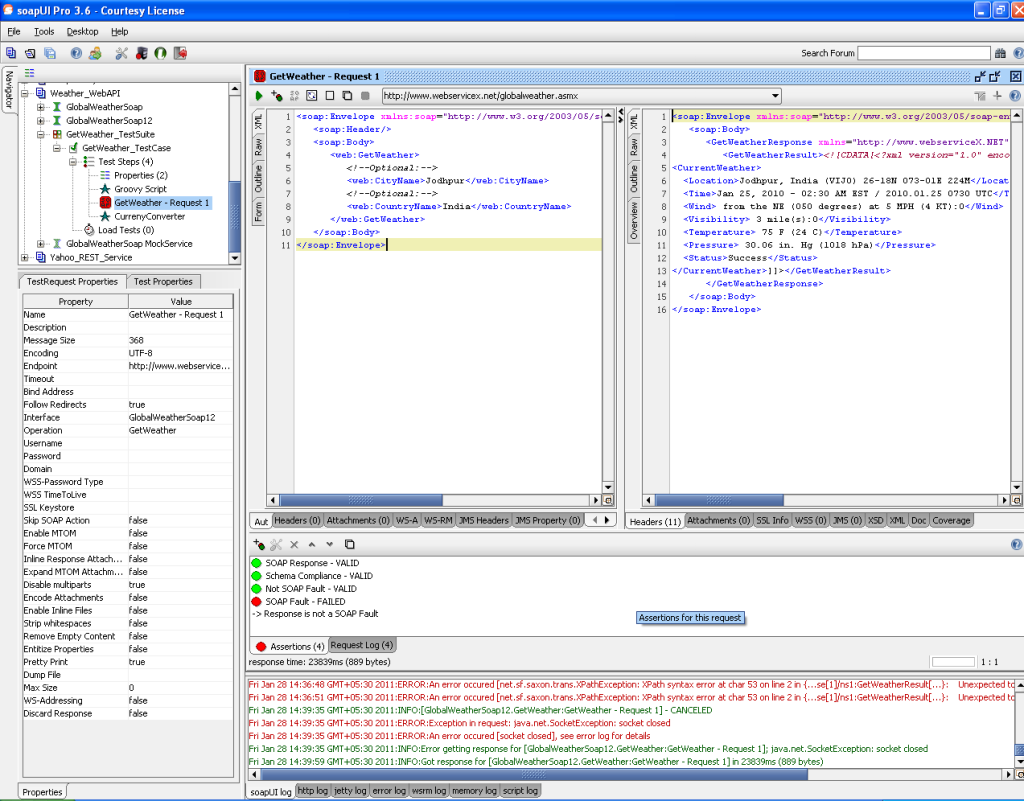
Assertion can only be used with either Test Step or Test Cases. It is not possible to put an assertion in the request template under the Binding Operation/Method. To put an assertion, click on the icon (refer attached screen shot) next to "Run the Test Step"


Now refer the below attached 2 screen shots for an example of xPath assertion in soapUI. Any xPath assertion would comprise of 2 things - (a) is xPath expression to evaluate the XML file and fetch the required data. (b) the expected response which needs to be compared against the xPath expression result.

I have used the following xPath expression :
declare namespace ns1='http://search.yahooapis.com/ImageSearchService/V1/imageSearch';
//ns1:Response[1]/ns1:ResultSet[1]/ns1:Result[1]/ns1:e[1]/ns1:FileFormat[1]


 I hope these snapshots & the blog content would be of some help for you to understand the "Assertion in soapUI " .

EndNote: Assertion are very useful while performing the regression testing and to validate the test results without digging into much details.